
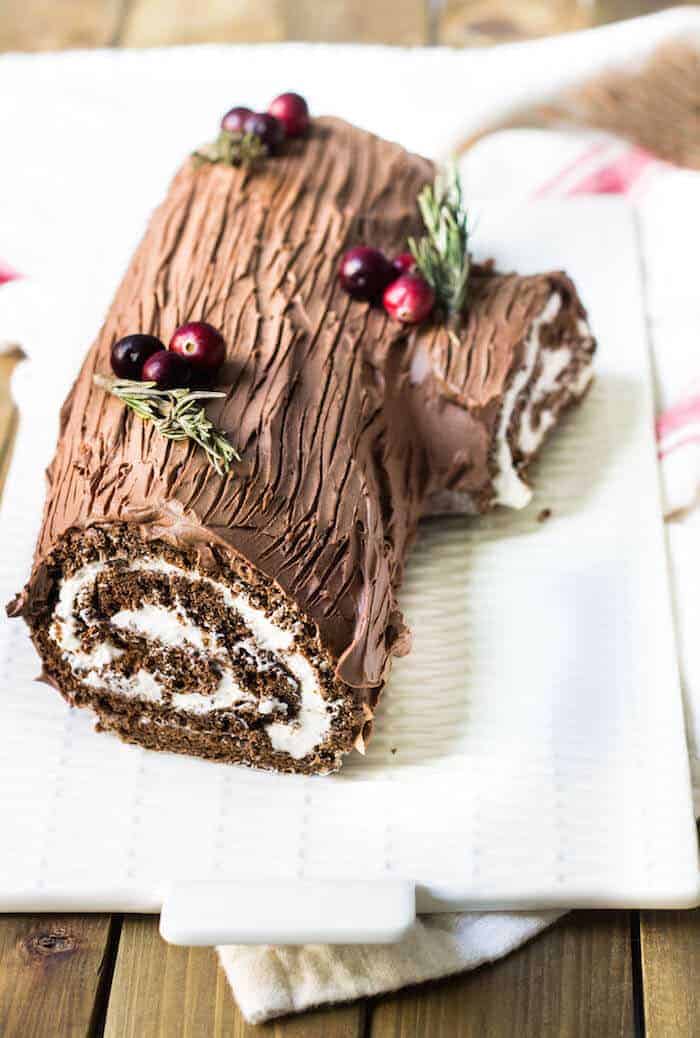
Bûche de Noël Recipe (Yule Log Cake)
One of my favorite cakes to make during the holiday season is this traditional bûche de Noël cake. This bûche de Noël recipe is a lovely holiday classic for the French, made during Christmas Eve. In America, we know a bûche de Noël as a yule log cake. In France, the cake is also referred to as a gâteau de Noël or gâteau roulé.
Why I love making a bûche de Noël
I love this easy bûche de Noël recipe so much because it’s a foolproof way to make an impressive, festive cake without any fancy cake decorating skills.
The cake stuns and impresses everyone who sees it, but when I say you can be a beginner baker and make this, I mean it!
Trust me, I’ve seen tutorials for painted cakes with marzipan-crafted toppings that are beautiful but incredibly time-consuming and require extensive skill to actually execute.
I get the fear that goes into any cake that looks the slightest bit decorative, but not this cake. This bûche chocolat will make you look like a total cake boss in front of your family and friends without requiring you to actually be one.
Not only that, a bûche de Noël isn’t made with the kind of icky artificial ingredients that often look pretty on fancy cakes but taste awful. A whip cream filling and coffee-infused chocolate frosting make this cake 100% scrumptious.
Origins of the Bûche de Noël
You may be wondering, “Where did the Buche de Noel originate from?”
It’s not really known how yule log cakes came to be, but theoretically, they’re supposed to represent a log that’s specially selected to be burned during Christmas. Regardless of the bûche de Noël history, I think the cake is particularly adored in French culture because the basis of the cake is a sponge cake, which is just the kind of light and airy type of cake that the French love.
A bûche de Noël cake is typically a chocolate cake filled with chocolate cream, but I decided to balance the chocolate out with simple, sweetened whip cream. I have shared the classic form of this chocolate roulade (another name for a Swiss roll cake like this) before on the blog.
The cake itself is rich with chocolate flavor, so having a vanilla whipped cream really helps keep things from being too sweet or over-the-top.
Ingredients You’ll Need
- Large eggs, separated into egg whites and egg yolks
- Confectioners’ sugar
- Flour (preferably cake flour for the perfect sponge cake)
- Unsalted butter
- Heavy whipping cream
- Vanilla extract
- Chocolate chips for chocolate frosting or chocolate ganache
- Cranberries and rosemary sprigs
- Meringue mushrooms or meringues for decoration (optional)
You’ll also need tools like mixing bowls, a large bowl, offset spatula, fork, knife, electric mixer, parchment paper, a half sheet baking pan, and a clean kitchen towel or tea towel for rolling the cake.
Preparing the Sponge Cake
The hardest part of a bûche de Noël is rolling the cake while it’s still slightly warm. Start by preheating your oven, then whisk your egg whites to soft peaks in a large bowl using an electric mixer. In another bowl, combine your dry ingredients and gently fold them into your cake batter, adding egg yolks and vanilla extract for flavor.
Pour the mixture into a pan lined with parchment paper. Bake until a toothpick inserted into the center comes out clean.
As soon as the cake cools, turn it out onto a clean kitchen towel dusted with powdered sugar, then roll carefully to form a cake roll.
The trick to preventing cracks in a bûche de Noël cake is to roll the cake while it’s still slightly warm. Then when the cake cools completely, unroll it, spread the whip cream on top, and roll it back up.
A piece of cake is then sliced off right from the front and attached to the side of the bûche de Noël to mimic a branch.
Frosting and Decorations
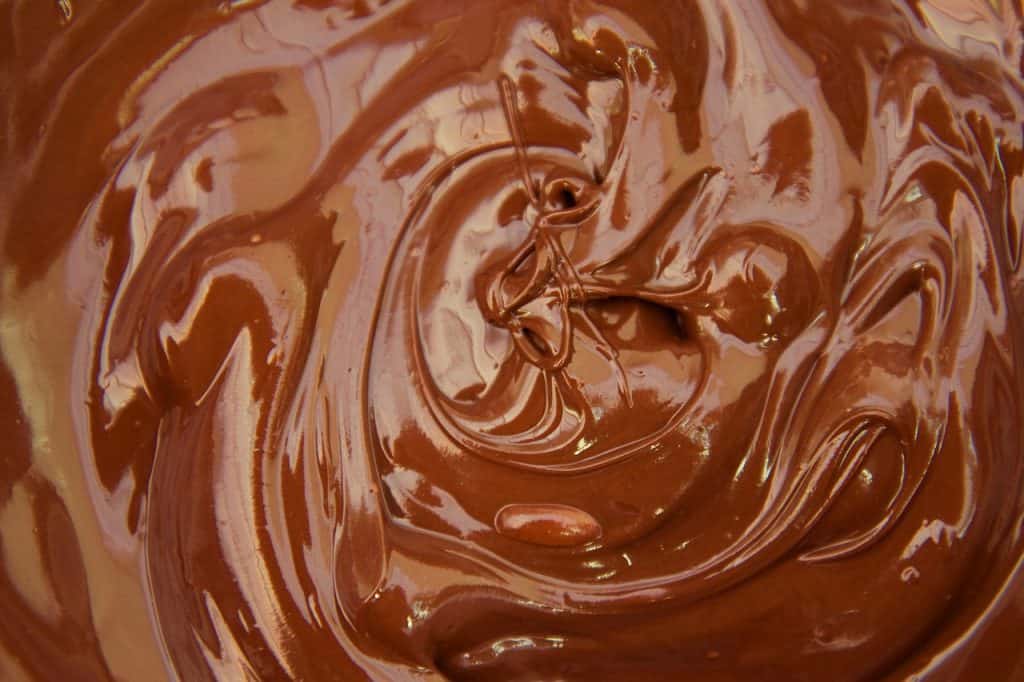
Instead of doing a plain chocolate ganache, I utilized my favorite recipe for mocha frosting, using dark chocolate chips. Nestlé’s dark chocolate chips melt really well and are already in morsel form, so there’s no need for chopping or a double boiler.
If you want to skip the coffee flavor, you can, but I highly recommend trying it out as it’s so delicious!
Cover the cake roll using a rubber spatula. Usually, cakes are frosted with offset spatulas to give a perfectly smooth finish, but in this case, we want it rustic. Slight ridges and bumps are welcome! In fact, we’ll even be dragging a fork through the frosting to give more ridges and provide that distinct log appearance.
You can decorate with cranberries and rosemary sprigs, and if you can get your hands on meringue mushrooms or meringue mushroom caps, even better!
A pipe can be used to add small details or extra whip cream accents. If you don’t want to use real herbs or cranberries, you can always adorn the cake with a sprig of faux greenery.
Tips for the Perfect Bûche de Noël
- Roll the cake while it’s still slightly warm. This is the trick to preventing cracks in your bûche de Noël cake. Use a clean kitchen towel or tea towel dusted with powdered sugar to help roll it into a cake roll.
- Be patient with your electric mixer when whipping the frosting. It may feel like it won’t come together, but it will turn into the perfect chocolate frosting or mocha frosting consistency if you give it time.
- Use room temperature eggs. Whipping your egg whites to soft peaks works best when eggs are at room temperature.
- Don’t overbake the sponge cake. Your warm cake should be flexible enough to roll without cracking; pulling it out too late from the oven can make it brittle.
- Spread the whip cream gently. Once unrolled, use a large bowl and offset spatula to evenly spread the filling before re-rolling the cake roll.
- If your chocolate ganache is not whipping up as well as you want after it comes out of the fridge, give it another 15 minutes before trying again. Fridges are set to different temperatures so that can affect how quickly the ganache chills and whips up.
Frequently Asked Questions
How long can a Buche de Noel be made and refrigerated before serving?
A bûche de Noël is best made no more than 1 day in advance for optimal taste and texture, but it can be safely stored and enjoyed in the fridge for up to 3 days before serving.
Can I skip the Kahlua?
Yes, you can either skip the Kahlua if you don’t want to add it, or if you don’t have it, you can use brewed coffee 1:1.
Can I skip the coffee granules?
Yes, if you don’t want the coffee flavor, you can, but I highly recommend trying it as it’s such a delicious combination!
We are a small family, can I cut this recipe in half?
Yes, but you’ll want to use a quarter sheet pan instead of a half sheet pan to bake the cake.
Can I use regular flour?
Yes, just note that it won’t be quite as delicate as cake flour!
Does the cake need to be refrigerated when it’s done?
Yes, because the cake has a cream filling, it’s very important to store the cake in the fridge. I like to store it in a covered cake stand in the fridge. If you don’t have one, you can loosely cover the top with plastic wrap and then just drag a fork through the top again if there are any smudges in the frosting when you take it out.


Want to watch a video tutorial of this recipe?
Head over to the Buche de Noel class website to get the video class tutorial, which is available for you to watch whenever, wherever you want, as many times as you want. The step-by-step lesson will guide you through making this recipe so it end’s up foolproof for you!

Buche de Noel
A chocolate swiss-roll style cake, filled with whipped cream and covered in mocha chocolate frosting.
Ingredients
for the cake
- 4 eggs, yolks and whites separated
- 1/2 cup sugar
- 1/4 cup unsweetened cocoa powder
- 1/3 cup cake flour
- 1/2 tsp instant coffee granules
- 1 tsp baking powder
- 1/4 tsp salt
for the filling
- 1 cup heavy whipping cream
- 1/4 cup powdered sugar, plus more for dusting
- 1/2 tsp vanilla extract
for the frosting
- 6 oz dark or bittersweet chocolate chips, 3/4 cup
- 1.5 tbsp softened unsalted butter
- 1 tsp instant coffee granules
- 2/3 cup heavy cream
- 1/2 tbsp Kahlua
- 1/2 tsp vanilla extract
- cranberries and rosemary for garnishing
Instructions
- Preheat your oven to 425°F and line a half sheet baking pan with parchment paper. Cut a slit in the parchment paper in each of the four corners of the pan so that the parchment paper lies completely flat against the edges of the pan. Use office binder clips to clip the parchment paper to the edges of the pan. Set aside.
- Drop the egg whites into the bowl of a stand mixer. Whisk on high speed for about 2 to 3 minutes, until wet, soft peaks form. You want the whites to stay hanging on your whisk when they're held upside down, but you don't want them so stiff and dry like you would for a merengue (aim for softly curled tips). Temporarily set the whites aside.
- In a large bowl, whisk the egg yolks and sugar together until they're pale yellow. In a separate, smaller bowl, sift the cocoa powder, cake flour, coffee granules, baking powder, and salt together. Add these dry ingredients to the bowl containing the egg yolks and sugar. Whisk to combine - batter will be VERY thick and hard to mix, but this is normal, so just try your best to mix everything together.
- Add in half of the egg whites and use a rubber spatula to gently fold the whites into the batter. You don't have to be extra gentle at this point since you are merely trying to loosen up the batter with the egg whites. Now, add the remaining half of egg whites and, this time, be VERY gentle when folding the whites into the batter with your spatula; make light, long folds.
- Pour the batter into you're prepared pan and use your spatula to gently smooth out the batter. Don't tap the pan or move the pan side to side - you don't want to ruin the air bubbles you created with the whipped egg whites. Bake the cake for 6 to 7 minutes, or until the cake springs back when gently pressed by the tip of your finger (for me, it's always about 6 1/2 minutes in the oven). Let the cake slightly cool in the pan for 2 minutes - no longer.
- Meanwhile, prepare a light kitchen/tea towel by sprinkling powdered sugar all over it. Flip the cake out onto the towel and very gently peel the parchment paper off inch by inch. Grab one of the short sides of the cake and roll it towards the other short side, rolling the towel with it as you go. Let the cake remain in this rolled shape until it's completely cool. (Note: It’s important to do this while the cake is still warm as the cake is still flexible at this point and this prevents the cake from cracking or tearing as you roll it).
- Meanwhile, create the frosting by adding the chocolate chips, coffee granules, kahlua, unsalted butter, and vanilla extract to a medium bowl. Heat the heavy cream over medium-low heat until it’s hot but not boiling (the edges should begin to simmer and steam should rise from the cream). Pour this hot cream over the chocolate and contents in the bowl, then use a spoon to stir the mixture together until it’s completely smooth. Cover the bowl with a sheet of plastic wrap and refrigerate for 30 minutes - no longer.
- While the frosting chills, whip up your heavy cream in your stand mixer on high speed for one minute, or until the folds of the whisk start appearing in the cream. Add in the vanilla extract and the powdered sugar and continue to whisk on high until the cream is thick like frosting.
- Once your cake is cool, unroll your cake and use an offset spatula to spread the whipped cream all over the surface, leaving a very small border around the edges of the cake unfrosted. Gently roll the cake back up just like you did before (minus the towel), with the seam side facing down.
- Take a sharp knife and cut off a 2 inch slice from one end of the cake, cutting at an angle so that one end of the slice is 2 inches and the other end is closer to 1 inch. Take this slice and place the side of it that isn’t cut/exposed and attach it to the main cake log somewhere near the middle of the log.
- Use a hand mixer to whisk the chilled frosting for 15 to 25 seconds, or until you can see the whisk leaving indentations in the frosting. Don’t whisk any longer than that as it’ll ruin the frosting. Use a rubber spatula to smooth the frosting all over the cake log and it’s side stump. It’s preferred that you don’t use an offset spatula as the rubber spatula leaves nice streaks that make the cake look more like a log. Take a fork and run it down the length of the cake log several times. Adorn the cake with cranberries and rosemary for a more festive look.
Notes
If you don't have kahlua, you can either leave it out or equally substitute with brewed coffee.
Nutrition Information:
Yield: 10 Serving Size: 10 ServingsAmount Per Serving: Calories: 293


Hello, Beeta, I’m ready to attempt this cake and will make a smaller one using a quarter sheet pan. Does the bake time remain the same? Thank you!
Hi Olga, you can keep the same timing! Merry Christmas! 🎄
Thank you, Beeta!💝