
No Knead Dutch Oven Bread Recipe
Is there anything better than freshly baked bread, warm out of the oven, slathered with some salted French butter? And now, thanks to this incredibly easy and delicious no-knead dutch oven bread recipe, you can enjoy this moment of bliss whenever you want!
Quick Dutch Oven Bread
Before settling on this recipe, I tried a handful of dutch oven recipes that called for various techniques and fermentation times.
Despite the no-knead name, some of these quick no-knead bread recipes required kneading. Obviously, that sort of goes against the intention of this kind of recipe.
I also tried a sort of artisan no-knead bread recipe that calls for a very long fermentation process (over 12 hours at room temperature on the counter), but that was a lot of extra time that didn’t really contribute to a lot of great flavor.
Worse, the effect was almost as though the bread fermented too long and didn’t rise quite as nicely as it could have.

In the end, out of all the no-knead bread variations I tried, I crafted my own no-knead dutch oven bread recipe.
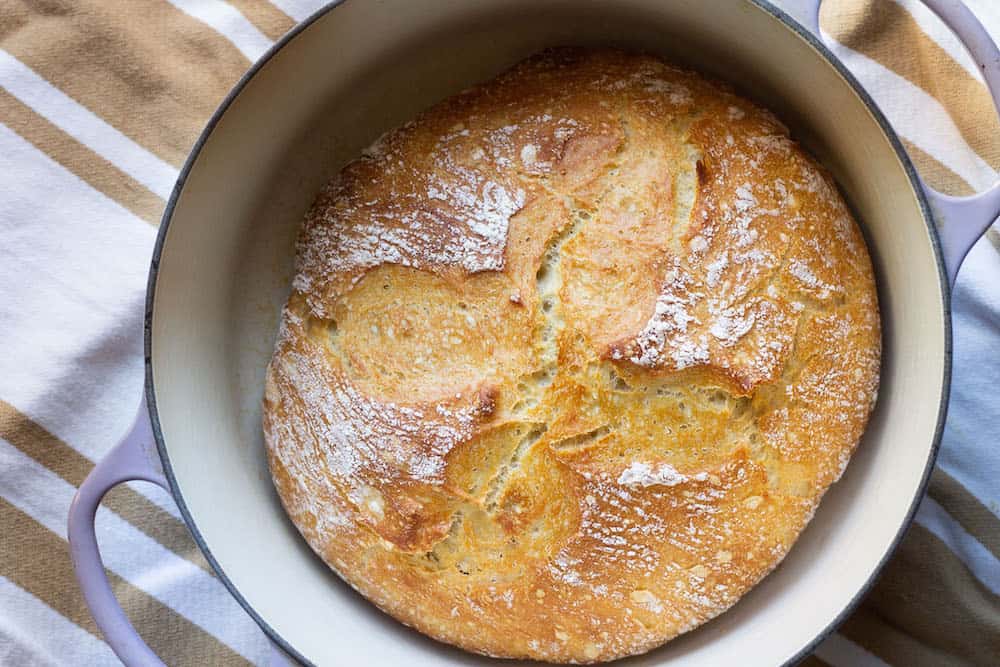
This bread delivers ease, beauty, a tender crumb, and a crunchy, bakery-style exterior – all the makings of a gorgeous loaf of homemade bread.
Best Dutch Oven Bread Recipe
If you’re looking for a no-knead bread recipe without a dutch oven, you can find one for that here.
The thing is, though, you won’t get the incredibly crunchy crust you get here with this dutch oven recipe.
A dutch oven, by the way, is just a special type of thick-walled pot with a tightly fitted lid (think Le Creuset), that happens to get really hot and make for the perfect container for baking bread in.

This no-knead dutch oven bread recipe is the best, in my opinion, because not only is it simple to make, but it’s relatively quick compared to some of the longer bread-making recipes I’ve come across.
You’ll put together the dough in less than 15 minutes, let it rest for an hour, then you’ll gently shape it and let it rest a second time while the oven preheats. Once it’s in the oven, it’ll bake for 45 minutes, et voila!
You’ve got a gorgeous, artisan loaf that tastes as good as it looks!

Tips for Making No-Knead Dutch Oven Bread at Home
This recipe is really easy to make, but just a few helpful tips you may want to consider if this is your first time attempting bread at home or using a dutch oven:
- Bread dough loves a warm, draft-free environment when it proofs. To create this, I turn on my oven’s warm setting for exactly 30 seconds. I then promptly turn off the oven, and stick my bowl of covered bread dough in this slightly warm spot to rest for an hour. It always doubles in size beautifully this way.
- This bread dough is incredibly sticky, and using a bench scraper can be a Godsend. It’s not a must, but rather very helpful. You can use the scraper to help you shape the dough into a smooth mound.
- When you’re activating yeast, it’s imperative that you use the right temperature of water. Too cold and your yeast will never “wake up,” and too hot, you may kill your yeast. A handy food thermometer will help you measure the perfect temperature (105-110°F), and ensure you get your yeast activated properly.
- You can use a sheet of parchment paper to line your dutch oven pot (it also makes it really easy to transfer the dough to your pot), or just use spray oil. I haven’t noticed a difference in terms of the crust on the bottom of the bread; both ways result in a crisp bottom.
- If you use a 5 1/2 quart dutch oven, like I did, you’ll get a larger loaf when it comes to overall diameter, but will lose a little bit of high. You can double the recipe to compensate for that, or use a smaller dutch oven.
- Be sure to check your dutch oven manufacturer’s instructions on temperature limits. Some can go up to 500°F (such as Le Creuset), while others recommend 400°F and under. If that’s the case, you can adjust to 400°F and bake slightly longer, as needed.

What to Serve this No-Knead Dutch Oven Bread With
Honestly, I could just eat this bread on it’s own with some good French butter, but if you’re looking to pair it with some meals, then I’d go for a few French stews that just beg for a crusty piece of bread, including:
- Coq au Vin (Chicken cooked in white wine)
- Beef Bourguignon (Beef braised in red wine)
- Chicken Provençal (Chicken cooked in tomatoes and olives)
I also think you can cut this loaf up into smaller pieces and serve it with some appetizers, such as:
- Baked Brie with Apples and Pecans
- Pear Walnut Crostinis with Ricotta and Honey
Follow my advice to cut this bread up into slices and freeze them in a ziplock bag so that you always have a slice handy for whatever recipe you desire!

No-Knead Dutch Oven Bread Recipe
A super easy recipe for making a bakery-style loaf with a tender crumb and crispy, artisan exterior inside of a dutch oven, without any need for kneading.
Ingredients
- 3 cups all-purpose flour, plus more for dusting and shaping
- 2 tsp active dry yeast
- 1 1/2 cups warm water, 105-110°F
- 1 1/2 tsp sea salt
- 1/4 tsp sugar
- spray oil or parchment paper
Instructions
- To a large bowl, add the active dry yeast. Gently pour 1/2 cup of the warm water over the yeast, then gently swirl in 1/4 tsp sugar. Let this mixture rest for 10 minutes until it's foamy.
- Once the yeast is activated, add in the flour, salt, and the rest of the 1 cup of warm water. Stir everything together with a wooden spoon until you get a shaggy, compact looking dough. It won't look like a nice firm ball and it will be very sticky, but we're just going for a lump of dough where the flour's been mixed in well together with the rest of the ingredients. Cover the bowl with a sheet of plastic wrap.
- Turn on your oven's warm setting for 30 seconds. Promptly turn the oven off after 30 seconds. Now, place the bowl of covered dough in this slightly warm environment. Close the oven door and let the dough sit in the *turned off* oven for 1 hour.
- After 1 hour, your dough should be doubled in size. Remove the bowl of dough from the oven; turn on the oven to bake and preheat to 450°F. Be sure to place your dutch oven pot (with the lid on) inside of your oven on the middle rack so that it preheats with the oven too.
- Meanwhile, flour your work surface really well. I like to use a silicone baking mat on my counter and dust that generously with flour. You want to then dust your hands generously with flour, and continuing doing so, as you gently pry the very sticky dough from the mixing bowl. This is the trickiest part of the recipe just because the dough is so sticky, but just keep sprinkling flour on the dough and your hands to do your best to remove the dough and gently shape it into a smooth mound. Depending on how nicely you got your dough out of the bowl, you may need to fold some of the dough over itself and spend more time trying to shape it into a smooth mound. It won't look like a firm dough ball by any means, and instead will have a more flattened, mound-like appearance; this is normal.
- If you're using parchment paper, you can transfer the dough right over the center of a large sheet of parchment paper. If not, just leave the dough on your floured surface. Cover the dough with a damp kitchen towel as the oven continues to preheat.
- Once the oven beeps, signifying that the preheating stage is over, continue allowing the oven (and dutch oven inside it) to heat for another 20 minutes. After that, remove the dutch oven. Take the lid off and spray the bottom of the dutch oven with your spray oil (if you're not using parchment paper). Flour your hands and gently transfer the dough to the dutch oven. If you're using the parchment paper, then you can just pick that up with the dough on it and transfer it with the paper directly into the dutch oven.
- Take a pair of kitchen scissors (or a bread lame aka razor) and score the top of the dough. You're just going to make a superficial X into the top of the dough, making a 1/2 inch cut deep. Put the lid on and bake the bread, covered, for 30 minutes. After 30 minutes, remove the lid and continue baking, uncovered, for 15 minutes.
- When the bread is done, simply remove it from the dutch oven and place on a wooden board. Let it slightly cool before cutting into it with a bread knife. If you want to store this bread, you can either place the loaf in a ziplock bag (after it's cooled) and let it hang out on the counter for a few days, or you can cut the bread into slices and freeze them in a ziplock bag. Then, when you're ready to enjoy again, you can toast it and experience the bread as if it's been freshly baked!
Notes
Recipe adapted from JoyFoodSunshine.com


What a great experience ! I followed your recipe and made a wonderful loaf with a crispy crust! I used my oval Le Crueset and parchment paper which worked well with no mess . My first successful loaf of bread…and definitely will bake this again. Thanks, Beeta.
Hi Cath! So glad you got a chance to try this recipe and enjoy a delicious, homemade loaf!
Hi Beeta, any idea if this would work w/ a 1:1 gluten-free flour blend? And what about add-in’s like chopped herbs or roasted garlic? Thanks!
Hi Meredith! You can definitely add in extra ingredients like herbs or roasted garlic. I haven’t tested it with a gluten-free flour blend so I can’t say what the resulting texture and crumb would be.
Hello, Do you have by any chance the measurement of the ingredients in grams?
Hi Juan, I always recommend the King Arthur Conversion Chart for any ingredient conversions! 🙂
My Dutch oven holds 2 quarts; is that large enough for this recipe?
Hi there! If it’s a 2 1/2 quart dutch oven, then it should be just fine! My 5 quart one is too big, but obviously works (I just don’t get as much height as I would with a smaller dutch oven like yours). 🙂
Thank you! Mine is exactly 2 quarts, but I might give it a try anyway.